How to install WordPress on an add-on domain using Softaculous
If you are using more then 1 domain in a single hosting plan as add-on domain then you can also install WordPress on your add-on domain. But for installing WordPress on your add-on domain it is necessary that domain has already added in your hosting account. If you do not know how to add a domain in your hosting plan then your can read this for help:
How to add a Domain as Add-on in cPanel
After adding the domain in your hosting account you need to follow the following steps for installing WordPress on your Add-on domain
Step1: login to your CPanel.
Step2: Scroll down to Softaculous App Installer section . Click on “WordPress” icon in the Softaculous app
![]()
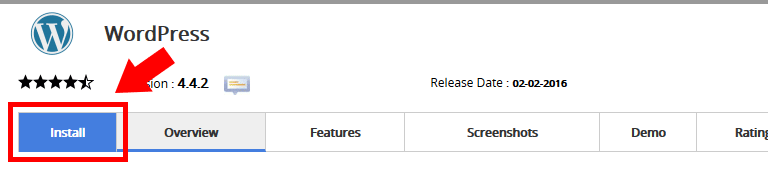
Step3: Click on button at the top navigation bar.
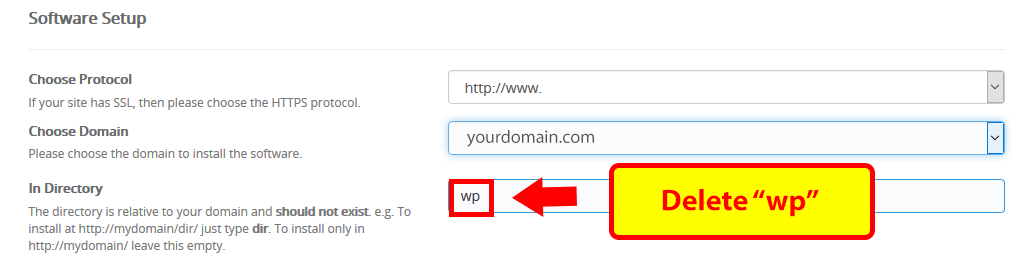
Step4: Now you need to enter the following details under “Software Setup”:
Choose Protocol: From the drop down menu select “http://www.” . This will install WordPress on “www.youraddondomain.com”. if you have installed SSL on your domain then select “https://www.” option.
Choose Domain: From the drop down menu select your domain on which you want to install WordPress.
In Directory: Delete “wp” directory to install WordPress on your root directory. If Not deleting it will install WordPress on “www.yourdomain.com/wp”. So you must leave this field blank.
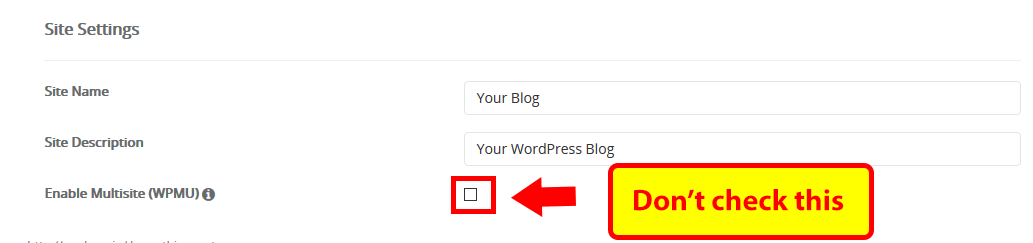
Step5: Under “Site Settings” enter the following details:
Site Name: Enter the name of your blog/website. For example: “Domainking Publications”.
Site Description: Enter basis description of your Website. Example: “My Cool Blog”.
Enable Multisite (WPMU): Leave this field as it is. Checking this option will enable WordPress Multi on your domain (Not Recommended).
Step6: Under “Admin Account” enter the following details :
Admin Username: Set a user name for WordPress login. This will be your username for your WordPress login panel.
Admin Password: Set a desired password for WordPress login panel.
Note: We recommend you to use password generator to set password. Because it generate safe passwords which cannot be guessed by anyone.
Admin Email: Enter your email that you want to use with your WordPress admin panel.
You can use your gmail/yahoo or any other email as your admin email or you can also create emails from cPanel on your domain and use your Custom Domain email like you@yourdomain.com as your admin email.

Step7: Review the Following options:
Select Language: English is selected By default. So you do not need to change the language.
Limit Login Attempts (Loginizer): Please leave this as it is. It is not recommended.
Advanced Options: Please do not make any changes in this section.
Select Theme: You can leave it for now and you can make changes later on from your WordPress library.
Email Installation details: Here you need to enter your Email at which you want to receive your WordPress details after installation.
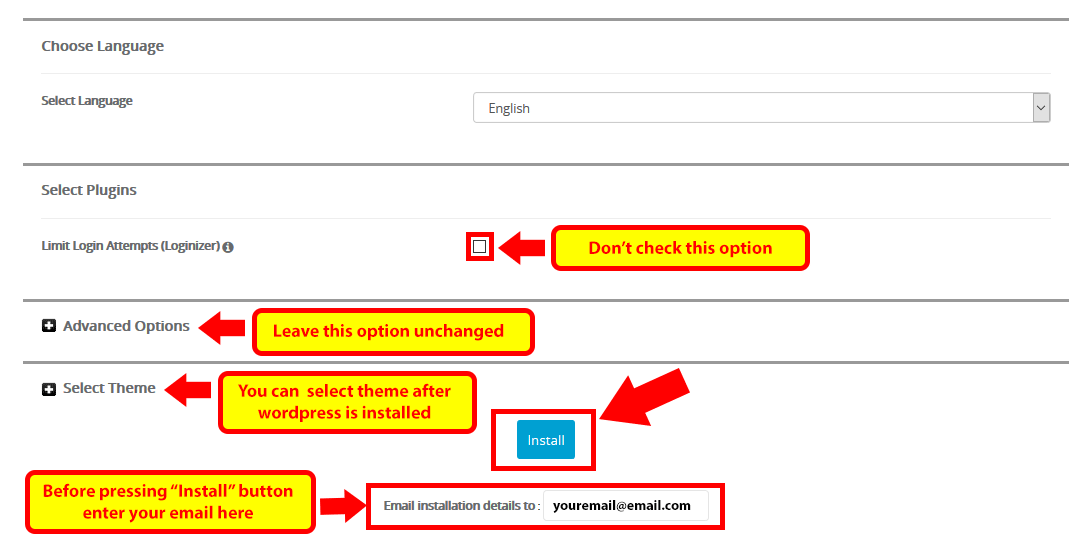
Step8: Click on button and wait for the installation process to get complete.

After few minutes you will see a message Congratulation, Your software was installed successfully. You will also receive a confirmation email on your email that you have entered during installation.