How to disable WordPress plugins directly from the phpMyAdmin interface
WordPress is a very powerfull CMS through which you can make your website faster in a easier way by using using different themes and plugins etc.
As plugins and themes adds functionality to your WordPress site but sometimes they can cause
various errors and problems. Heavy plugins may lead to higher consumption your CPU resources, slowing down your website speed due to their running scripts,or giving unusual errors related server, your php code etc.
Sometimes your themes and plugins are not compatible , so we recommend our users to use as much less plugins as they could becuse if you have install more plugins your site will load slow etc.
Disabling of WordPress plugins is helpful in those situations when a Webmaster getting some compatibilty issues or some errors(related to php source code,databases,server etc) due to already installed plugins.
Errors like Internal Server Error, Cannot modify header information – headers already sent etc are
Please follow the below mentioned steps for disabling your WordPress plugins from PhpmyAdmin of your cPanel:
2) Scroll down to Files section and click on “File Manager” icon.

After clicking on File Manager you will be redirected to a page where a list of files and folders in your hosting account is visible on screen.
3) Now you need to navigate to wp-config.php file in public_html folder.
4) Right click on wp-config file and click on view as shown in the screenshot.
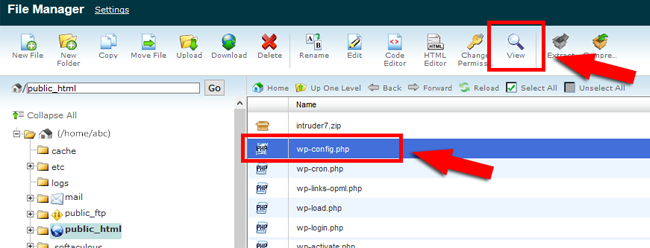
Note: Viewing of wp-config file is helpful for you to identify the database from which you want to disable plugins.This process is also useful if you have install more than one WordPress.
The name of your WordPress database looks like shown in the screenshot.

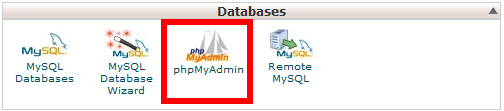
5) Now you need to return again to cpanel.
6) Scroll down to Databases section and click on “phpMyAdmin” icon as shown in the screenshot:
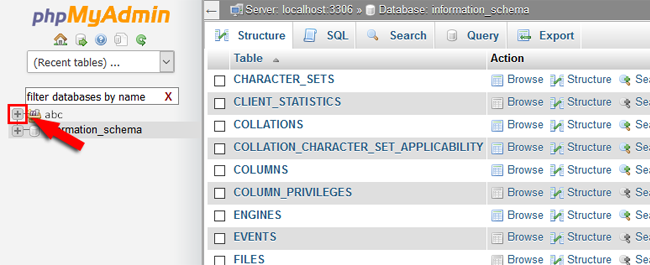
7) Now You will be redirected to phpMyAdmin panel. At the top left side you will see your database directory. Click on “+” to expand it.
8) Select and click on database name for which you want to disable the plugins as shown in the screenshot:
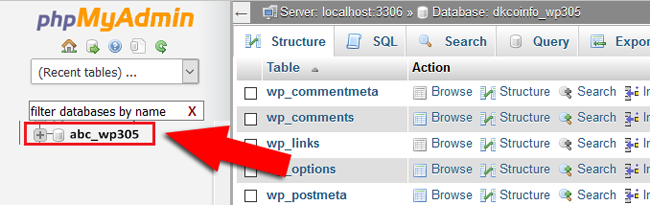
9) Now you will a list on the screen when you click on your database and you need to click on “wp_options”.

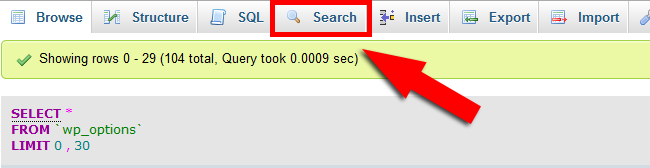
10) After clicking on wp_options , click on “search” from the top menu bar.
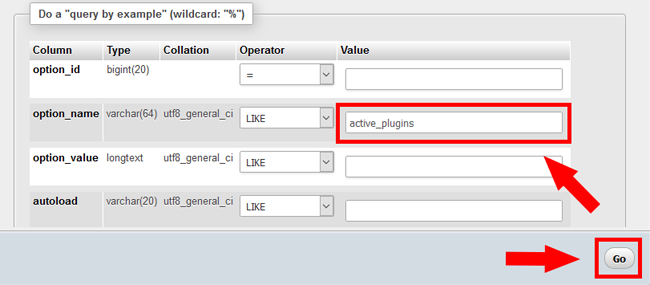
11) Now navigate to option_name and write “active_plugins” in its value field and press Go button.
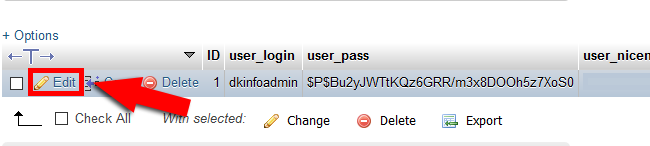
12) Now you are redirected to Search table structure page. Click on “edit” link as shown in the below screenshot.
13) In option_value field you will see your all active plugins.
For eg: You will see something like “a:{}” shows the number of plugins that you have installed.
Select and delete all your plugins in option_value section and press Go button.

This will deactivate all your plugins from your WordPress. Now you can activate any necessary plugins that you want from your WordPress dashboard .